How to get that postcard shot

Wherever I travel, I like to get that iconic, postcard shot. The Eiffel tower in Paris, or the medieval abbey of Mont Saint Michel. Even though these are common subjects, with a little care and preparation, they can make awesome images that will look great on the wall.

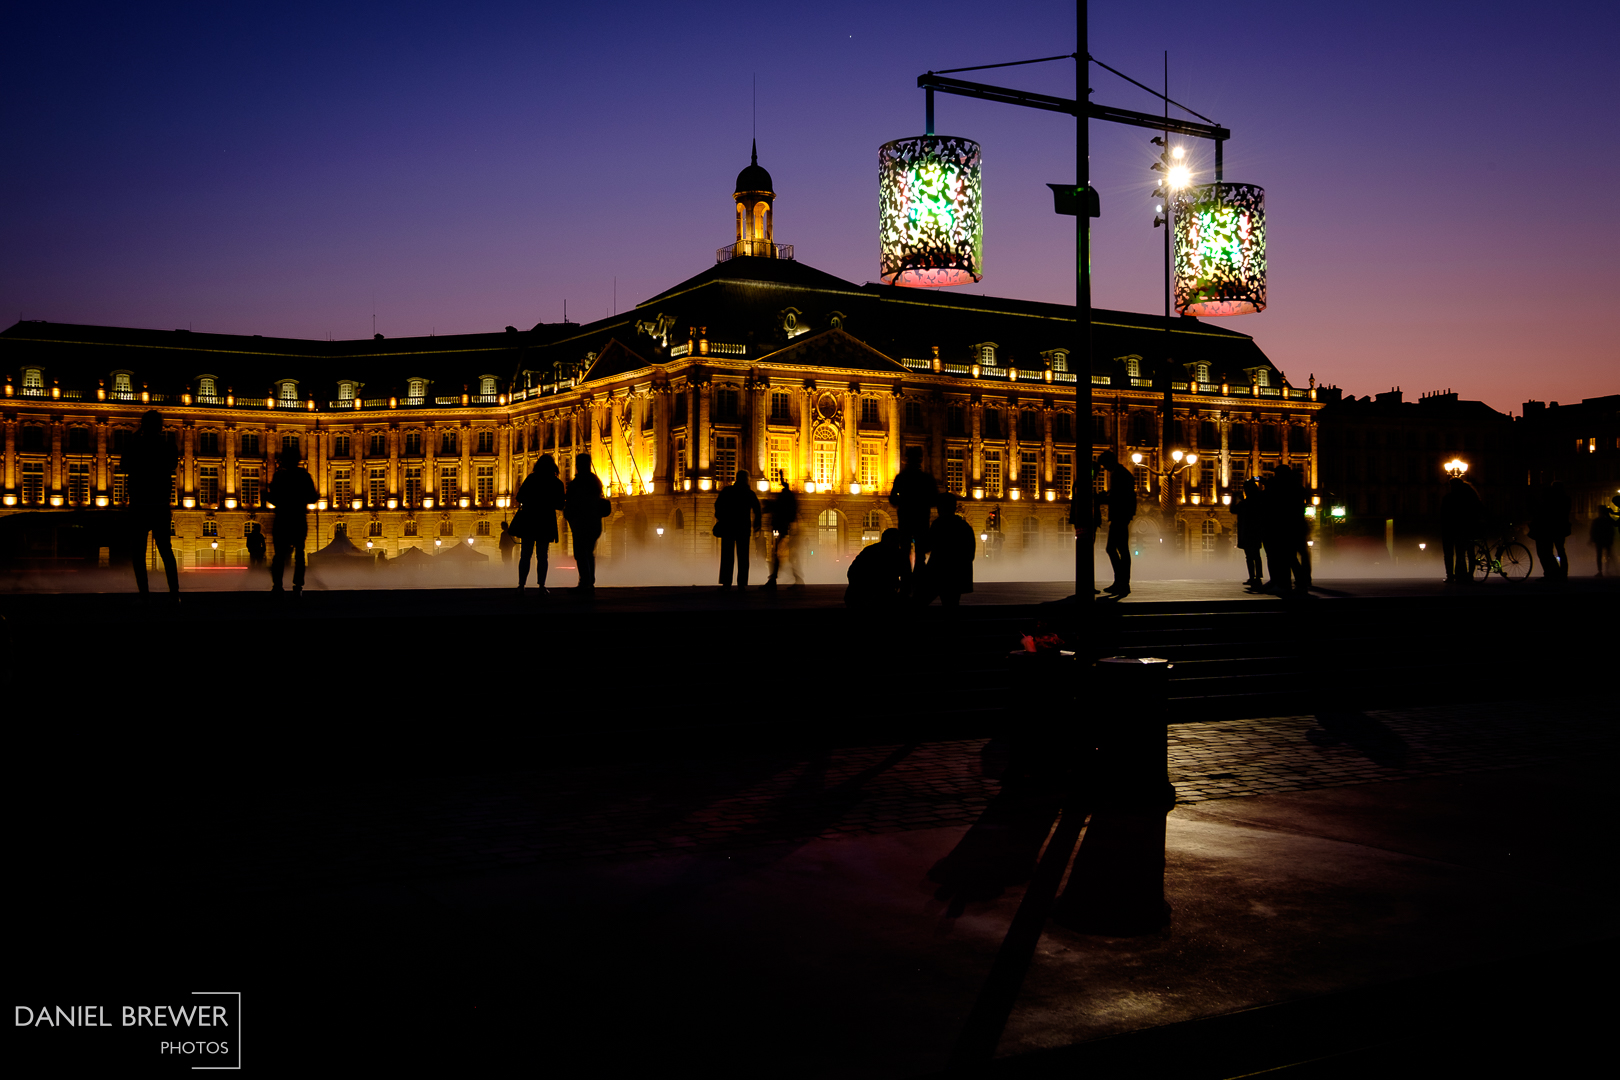
Before traveling, I do some searching of the internet for images of the destination city. I like using Google Image search as a starting point and identify prominent and photogenic landmarks and features. In our recent trip to Bordeaux, the Water Mirror struck my fancy. This is a fountain and very shallow splash pad that creates a mirror-like surface reflecting some beautiful old buildings.

The next step is to find out where the landmark is located and plan a place from which to take the picture. There are many apps and tools that can help with this. I fire up PlanIt! Pro on my Android phone. I’ll place markers on the map for the subject and camera locations. Then, if available in the area, I will use the built-in street-view to preview the location. I can set the date and time of day and check when sunrise and sunset will occur and see the positions of the sun and moon. Check the focal lengths guides, so you know which lens to use.


This is where I play around and try to visualize the shot I want to make. For the water mirror shot, I knew that the buildings are to the west of the mirror and they are illuminated at night. Shooting across the mirror into the sunset could make a spectacular image, with the fading, dark blue sky, and yellowy-orange illuminated buildings and depending on the weather, the sky could be dramatic too. This is my plan.


There is a saying “no plan survives contact with the enemy”. This is doubly true for photography! There might be construction, or road-works or scaffolding, or the weather can be uncooperative. Virtual scouting is no substitute for being there and seeing the place in person. If possible, I try to go to the location before my intended time for the photo and see the place for myself. This allows me to if the expected lens and pov will work. Checking things out ahead of time makes it easier later when setting up the shot for real under time pressure when the light is fading. If I have the time, I also try some different compositions or sketch images. Again, this allows me to play around so that I’ll be prepared and know exactly what I’m going to shoot later.

When the intended time comes for the photo, I make sure to get into position and set up a little early. You might think you have plenty of time, however when the sun is rising or setting, things happen far quicker than you expect. Being prepared ahead of time gives me the best opportunity to make the best photo I can. Patience is key. I take many photos and adjust the exposure settings as required. After travelling all that way, it would be a shame to just take one snapshot and leave and hope it’s good. I stay a little longer and take many images so that I can select the best later.

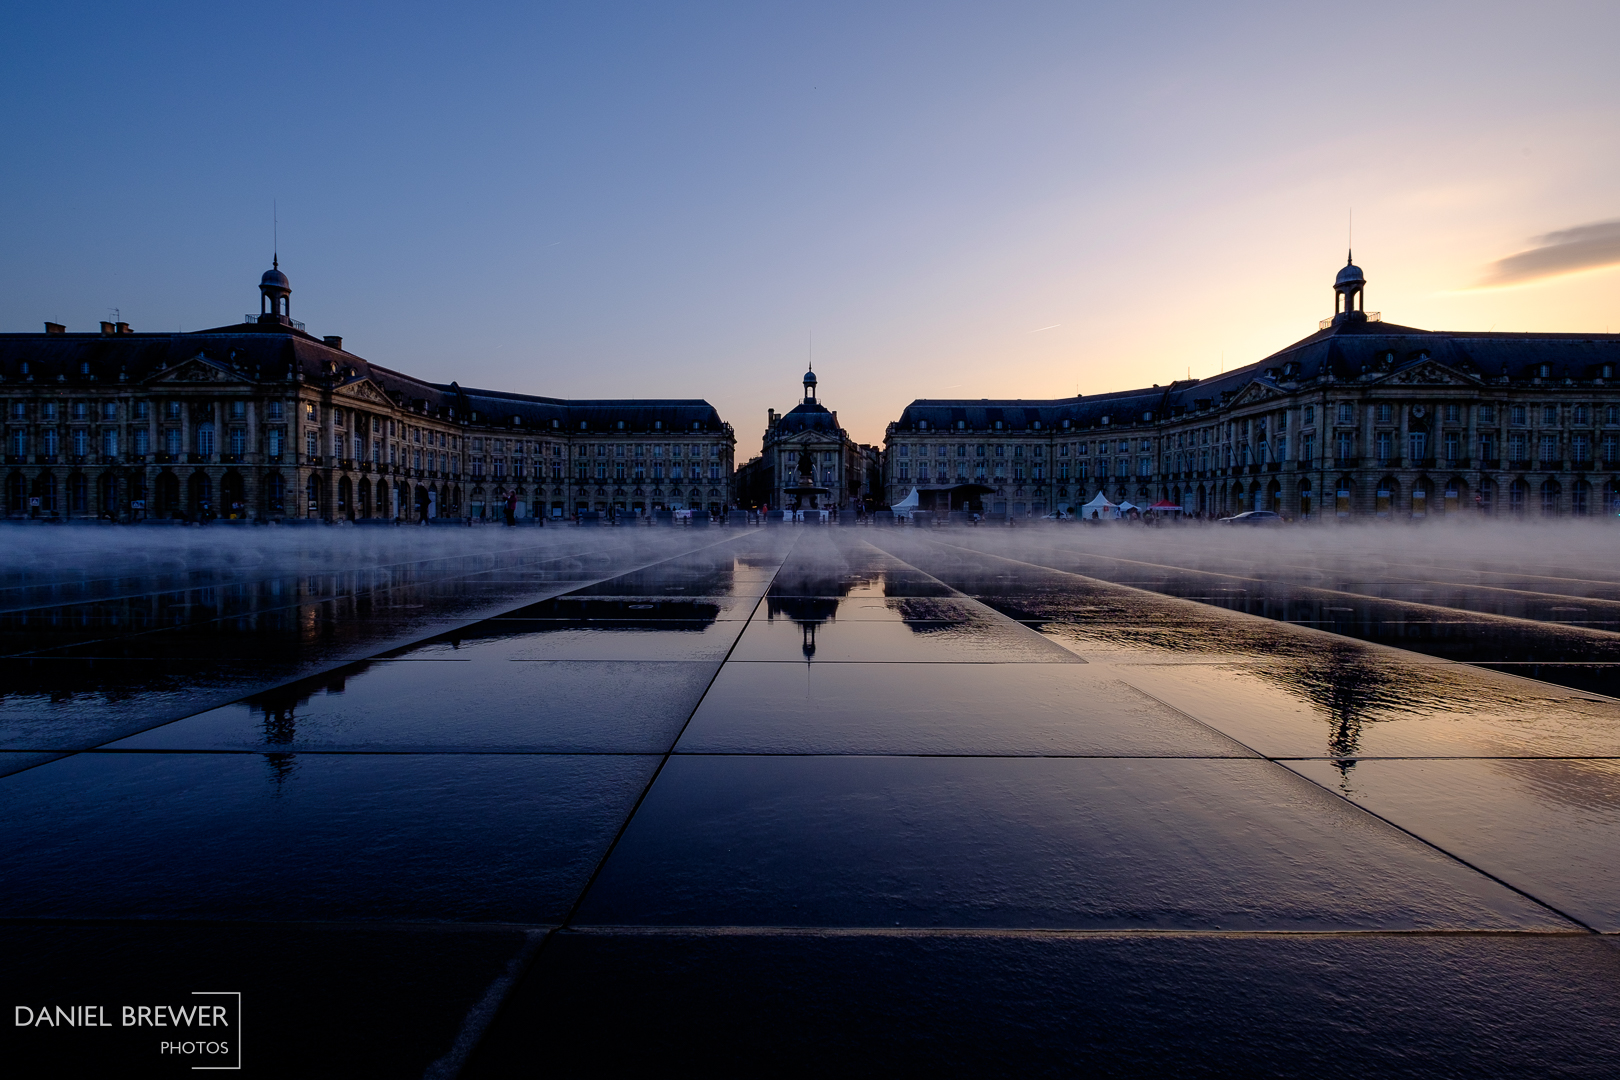
When I was taking the picture of the Water Mirror in Bordeaux, I hadn’t heeded my own advice. I hadn’t spent as much time scouting as I should have. There is a time during the fountain’s cycle when mist sprays up from the mirror. I hadn’t anticipated this and since I was using the XF10-24, which isn’t weather sealed, I had to pick up and my tripod and move it away to avoid the fine mist blowing around and return it into position after the mist stopped. In this case I was lucky that there were tiles on the floor and I’d made sure to align the feet of the tripod along the grout lines between the tiles. This made it simpler to return the tripod to the exact same position every time. Additionally, there were also a number of other photographers taking photos at the same time. It’s only polite to not hog a prime position.

What’s in my travel photography bag?

I’m getting ready to go on vacation and it’s time to prepare and pack my photography gear. Packing for travel always means some compromise - it’s not feasible to take everything. This means making some hard decisions. My guiding principle, is to go small and go light. We always do a lot walking around cities, and lugging around a ton of gear is just not fun. This is what I take with me:

I made the switch to Fuji and don’t regret it one bit! My main camera is the Fuji XT1. It’s a little old now, but it’s still a great camera. The image quality from the X-Trans sensor is fantastic. It’s small and lightweight and it’s also weather sealed. When coupled with one of Fuji’s weather sealed lenses, it can handle almost any weather we would encounter.

I try not to take too many lenses with me, as that can lead to a analysis paralysis. Less is more here. My go-to is the often overlooked 18-135mm. Yes, it’s not super fast, but it is small and light and has a great range. If I don’t know ahead of time what I’m going to shoot, this is the lens most often mounted to the camera. It’s weather sealed too, which is an added bonus if the weather turns bad. Next up is the 10-24mm ultrawide. I love this lens! Image quality is great, as with all the Fuji lenses I’ve tried. When I want a versatile wide angle, this is what I use. Finally, there is the 35mm F1.4. There is just something magical about this lens. F1.4 means it’s super fast and good for low-light or night shots and it is a useful focal length too.

As a backup camera, the tiny X70 comes along. It has the same sensor and image engine as XT1, but it fits in a pocket! The fixed 18mm lens is a nice travel wide angle and useful for some street photography.

Since these are both mirror-less cameras, it’s important to bring a bunch of backup batteries and chargers. Nothing is worse than running out of juice when you’re trying to get a shot. I have tried some non-branded batteries before, but I find they hold significantly less charge than Fuji’s. They also don’t keep their charge as long when not in use, which results in reaching for a fresh battery to find it only lasts a few minutes.

Other useful accessories include a cable release for night shots and long exposures. A polarizing filter can be useful to reduce haze in the sky or cut down reflections. An 10 stop ND filter from Breakthrough Photography is useful to take long exposures during daylight and add some dramatic streaks to sky and water. With all this talk of long exposures, a small, lightweight tripod is very useful. It’s a delicate balance between weight and stability, but I find the MeFoto RoadTrip Travel Tripod does a good job. I also usually take a tiny folding tripod in my bag so I don’t have to carry the full-sized one everywhere. This time I’m taking the new Platypod Ultra for when I need a discrete stable platform.

For backing up and editing in the field, I use a Microsoft Surface Pro 4. It’s small and very light and using the smart pen to draw directly on the screen is useful for editing. The built in SSD is also fast, which helps backup and editing speed.

And of course, don’t forget to bring lots of SD cards! I format these cards before leaving and put them in a holder case ‘face up’. Used cards go back in the case ‘face down’ so I can quickly identify which have been used and which are empty. I don’t delete or format these cards until I’ve returned home from travelling and backed everything up.

All of this needs a back to carry everything. The Everyday Messenger from Peak Design is my go-to. It’s a great looking, versatile bag. It has some very useful accessibility features like the separate laptop pouch, top zip and passport pocket. Since I keep my camera gear small, there is some space left over for a top, or snacks or water - which can be very useful when you’re out wandering around strange new places!